Showing posts with label building. Show all posts

Sunday, February 28, 2016

Sci-Fi shanties (and a product review)

For a long time I've had an idea about creating a futuristic shanty slum. The concept is that cheap, modular, habs are shipped to planets for terra formers, miners ect. After a while, maybe  these clusters of temporary homes become abandon or forgotten due to the economy collapsing, or war or something else equally devastating. People start doing what they need to survive  and a sci fi slum is created. 
I sourced some recycled materials for the main body of the habs. Mainly dairy tubs that are square. For the details I Purchased several different kits in the "do it yourself" section over at Laser Cut Card. Great kits, I highly recommend them, but you'll see that in the pictures. I tried to keep them somewhat the same, i.e. modular, but make them look as he residents have repaired or personalized them over time. 

Some of the card details I made, and some are the "bonus" pieces you get from the Laser Cut Card kits. What do I mean by bonus? 
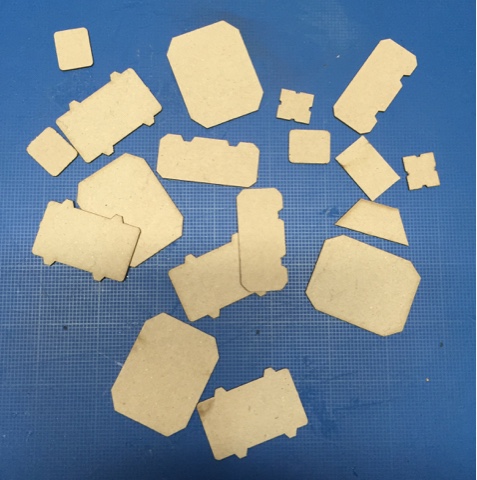
 These. These are the leftovers when you punch out the doors and windows. When you stack them and combine them with others they make great detail pieces. 
Here are a few more examples from thier door range, and their AC units.
 
Thanks for looking, comments welcome!
Papa Spanky

Saturday, January 18, 2014

The Devils Work

There is a saying that the devil is in the details. Well after the amount of time and energy spent on these seemingly little "details" I can see why.
 
Lets see what we got (Sorry about the jumbled picture subjects, I just took them as they were sitting on my workbench):
 
Fire hydrants, straw bales and some fall decor;


Dumpsters, trash cans, a beverage counter and more fall decor;
 

Chairs couches, and ice cream cooler (unfinished) an arcade game and some diner booths;
 
Lastly, these are going to be the streetlights that will be at the major intersections. I built and cast these, filling in the light with a 5mm half round jewel. A completely unnecessary and fiddly process to be sure, but its these little things that will hopefully make this board an exciting backdrop to my games.
 
Thanks for looking, questions comments always welcome!
Papa Spanky

Monday, January 6, 2014

Hardware and Halloween

Despite not having posted a regular update, I have been pretty busy hobby-wise. Today I present to you the last three buildings for Gray Haven.


These are the "Value Hardware and Sporting goods" and "Halloween 24/7". Sorry for the bad pic, lighting was horrible and the flash ruined most of the others.
Anyway, the Hardware store is an Ameritown police station and the Halloween store is a converted Plasticville firehouse.
 
 
The front of the Halloween store with the giant spider decoration and the riot cop and zombie costumes on display. I sculpted the pumpkin for the sign and the foam scrapbook letters were placed crooked intentionally. (honest!)
 
Some of you keen eyes might have noticed the stop sign in the first picture. Here are examples of a few more.
 
I purchase these from Scale Like Industries, you can find them here:
They are really nice signs printed on thin styrene. A few words of caution working with them though:
-Seal them first if you mask them off for any reason. I ruined my first batch of these with a liquid latex mask when I painted the backs of the signs.
-Too much styrene glue will melt/ warp them. This could be good or bad depending on the effect you want to create.
What else? I have corn. Yep corn.
 
These will be combined with pumpkins and hay bails for fall decor around town. I had to spray these with Army Painter desert yellow because they are supposed to be modeled as a live crop.
 
On the actual playing games side of things I got a lot of games of Zombicide in with some co-workers, played a few games of Operation Flashpoint with the family.
 I picked up three copies of X-wing that were on sale at 60% off and will be posting about that, I will have some examples of my castings I finally did, and will post/talk Deadzone in the next few days, so don't touch  that dial!
Papa Spanky
 

Tuesday, September 24, 2013

Fall Cemetery aka the zombie playground

So this is where the zombies are all coming from! I finally decided on how to finish the one short board edge for Gray Haven. I was going to make a separate board in the future that was just a cemetery, but this worked out nice to put it here. On with the pictures!


Here is the overview shot. Lets look at the details a little closer...
 
 
Zooming in a bit on the left side, we see the main concentration of dead folk. The tree is removable for storage, and the gates are magnetized for storage or when they get smashed down in-game by the undead hordes.
 
Zooming in more we see the detailed weathering on the grave markers. I make full size prop headstones for Halloween, and these use some of the same methods for painting, only smaller.  
 
 
Back out and move to the right, and we find the entrance, some more dead folk and the entrance to the mausoleum.
 
Here's the mausoleum and the back part of the property. About this part of the board: I put the power module for the lighted sign (seen in a bit) inside the mausoleum. I was going to run the cord under the grass, but had forgotten about the pumpkin patch the crazy old groundskeeper had planted. I had to put in a electrical "drop" over the patch. I tried to hide/integrate it the best I could, I think the crows help. Why is there a casket out back? Maybe the groundskeeper has his garden tools in there. Or fertilizer...
 
This is the welcome sign that sits outside the cemetery. It lights up, that's why I needed the power cord run. The little mound and rock is there just as a natural element.
 
 
I took these two shots to help if you needed a little perspective.
 
 
The Grass is teddy bear fur, all the leaves, bushes, and vines are Woodland Scenics products. I used lots of Sil-for clump foliage as well as dyed birch seeds. I picked up the walls and fence at Menards during Halloween last year. The pumpkins are from JTT, the headstones are from Renedra and GW.
 
Questions and Comments are welcome!
 
Papa Spanky


Thursday, July 11, 2013

Municipal buildings

These are what have been holding up most of my building progress for the past few months.


The Gray Haven Fire and Police stations. First the fire station- Its scratch built (still only 90% finished) and was a bit of a pain. The roof paper shrunk and warped the corrugated plastic I used for the roof. Making the roof removable was tricky; I didn't want it to have an obvious seam. I also "guesstimated" the entrance door size, and made it too big. The garage door does "roll up" and that's cool.
Then we have the Police station. This too had roof warping problems that took forever to figure out. The roof was based from card stock with shingles cut from watercolor paper. The paper shrunk after painting, and I had to straighten and re-enforce it with wood. The main building is a Plasticville Police station Glued to a Plasticville Fire station. The fire station doors became the rear "sally port".


 This is the inside view of the firehouse. Its still missing things like hoses and ladders, modern 1/4 scale fire hoses seem to be in short supply, so I'm making my own. I also am working on the sign for the parapet wall in the front.

 The front of the PD has the watch desk and the main desk...
while the rear has the lockup an processing. Its still a bit sparse, but furniture is slowly making its way into town, so you might see things in later posts or battle reports.
The cell is made from this  Fencing.

Post your questions and comments!
Papa Spanky


Sunday, September 2, 2012

Streetlights, people (oh oh ohhhhh!)


Today I finished up some streetlights for my town. I originally was going to cast my own, but for my own sanity I decided to purchase and modify some of the plasticville ones.
 Heres what I did:
 I clipped off the plastic bases from each pole. After that I used a dremel to smooth down the rough edges left from the base. Once those were done, I went about epoxying magnets into each base of the lights (fortunately they were hollow). After they dried I drilled tiny holes in the sidewalks of the boards at predetermined areas, and glued magnets into those. This was the hardest part as you need to keep the orientation of the magnets correct so the don't accidentally end up repelling each other. A quick rusty wash and a dull coat finish and these were done.


I will cast several of my scratchbuild lightpoles to put on the main drag on the south end of town. I just thought the plasticville ones were more subtle and saved a ton of time!

That covers the streetlights; now for the people. Two more for the population sign.


This gentleman is Danny Ling. A retired army reservist, he has lived in Gray Haven since he was 7 and will defend his home from all threats- foreign, domestic and other worldly.
Another stock Foundry model, I hated this one at first but when the paint went on it really grew on me. 


This guy is Dmitri. Just Dmitri. I thought he might kill me if I asked anything else.
Another stock foundry with some birch seeds on the base. Made em from my own tree! Honestly I had trouble with a back story for him, so that's why his is kinda lame.

There was something else I wanted to show you guys, what was it...

Oh yeah I finished the massive Mysterious East building!

This an import- export business located right next door to the Hydracorp building, and it opened about 3 months after Hydracorp moved in. Coincidence?...
I thought this building/ business would do good to forward many pulp or horror story lines. Practically anything can show up in town from all over the world and now have a plausible reason. Sometime in the future I might do a basement to this building and have it connect to Hydracorp and an underground bunker/lab/facility. This would all be on a separate board of course!
The front office. clear acetate line the windows. 
The rear storage and shipping area. Frosted acetate back here so no one can really see in!
The roof is in two separate pieces, one for the front and one for the back. I made it that way because it was easy to build and now i can use it to hide the storage area from players if needed. 
The rear loading area. 
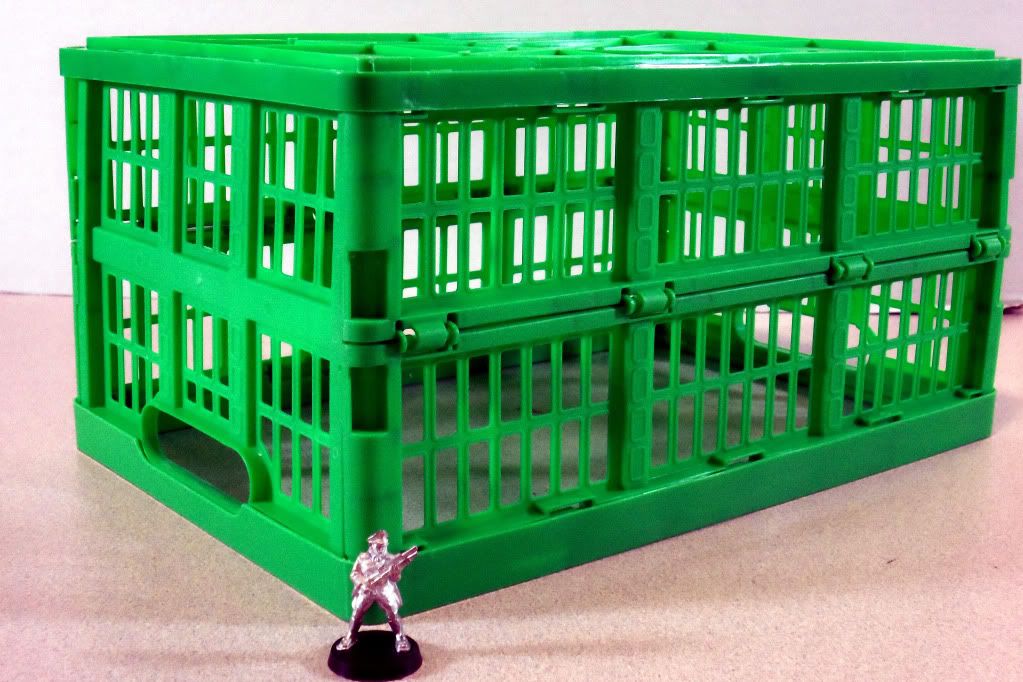
Those following along will remember this building was made from storage crates, like the Hydracorp one was. It was a bit more persnickety having difficult cuts for the L shape. 

 For my parting shot I give you Gray Haven in its unfinished glory. I added a few things that might become permanent for the shot. 

Don't stop believin'   
Papa Spanky

Sunday, August 12, 2012

Hydracorp office building

I finished this the other day: The Hydracorp building.
 Hydracorp is a highly secretive multi-billion dollar company. So when they bought and renovated an old office building in a small mid-western town, no one knew why.  Hummers, equipment for the local police department and millions to the local chamber of commerce each year guarantees  no one asks.


For those that don't remember, this building started out as a collapsible storage crate from the dollar store.  If you are interested in the progress how-to shots, just look at the office or building tags. Why Hydracorp? Well, every time I finished a detail on this build, two more things needed to get finished. I felt like I was fighting a mythical Hydra.


 Front and back shots. I lined the windows and front door with frosted vinyl file separators.
The back door opens. It was a pain to do, but it works.


This is the second floor office cubicles. I say this building is done, but it really need furniture and decor. That I will add over time, but for now its game ready. 


The second floor lifts off to show the... empty first floor! At least you get a good shot of the backdoor and the stairs.

The outside sidewalk and lawn. The tree and bush are removable for storage. I tried to get the tree to look like it had that landscape ring cut around it to hide that it was on a base. I used herbs mixed with PVA to make the mulch.

I'm pretty happy with this build, even though it was a lot of work.

Any questions or comments? post em!
Papa Spanky