Showing posts with label office. Show all posts

Thursday, July 11, 2013

Municipal buildings

These are what have been holding up most of my building progress for the past few months.


The Gray Haven Fire and Police stations. First the fire station- Its scratch built (still only 90% finished) and was a bit of a pain. The roof paper shrunk and warped the corrugated plastic I used for the roof. Making the roof removable was tricky; I didn't want it to have an obvious seam. I also "guesstimated" the entrance door size, and made it too big. The garage door does "roll up" and that's cool.
Then we have the Police station. This too had roof warping problems that took forever to figure out. The roof was based from card stock with shingles cut from watercolor paper. The paper shrunk after painting, and I had to straighten and re-enforce it with wood. The main building is a Plasticville Police station Glued to a Plasticville Fire station. The fire station doors became the rear "sally port".


 This is the inside view of the firehouse. Its still missing things like hoses and ladders, modern 1/4 scale fire hoses seem to be in short supply, so I'm making my own. I also am working on the sign for the parapet wall in the front.

 The front of the PD has the watch desk and the main desk...
while the rear has the lockup an processing. Its still a bit sparse, but furniture is slowly making its way into town, so you might see things in later posts or battle reports.
The cell is made from this  Fencing.

Post your questions and comments!
Papa Spanky


Sunday, August 12, 2012

Hydracorp office building

I finished this the other day: The Hydracorp building.
 Hydracorp is a highly secretive multi-billion dollar company. So when they bought and renovated an old office building in a small mid-western town, no one knew why.  Hummers, equipment for the local police department and millions to the local chamber of commerce each year guarantees  no one asks.


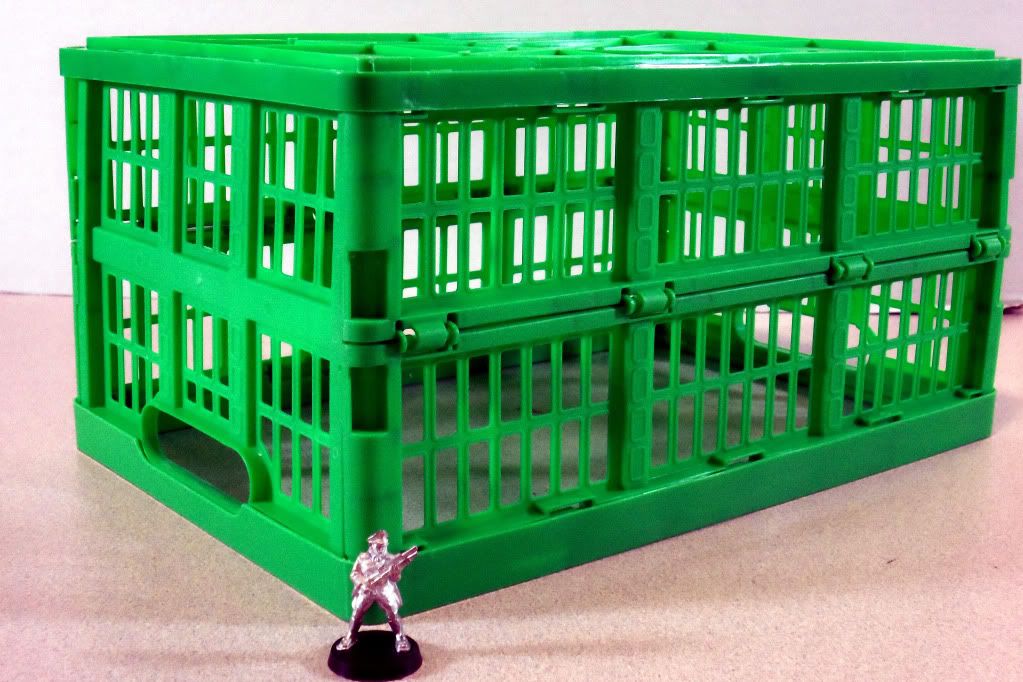
For those that don't remember, this building started out as a collapsible storage crate from the dollar store.  If you are interested in the progress how-to shots, just look at the office or building tags. Why Hydracorp? Well, every time I finished a detail on this build, two more things needed to get finished. I felt like I was fighting a mythical Hydra.


 Front and back shots. I lined the windows and front door with frosted vinyl file separators.
The back door opens. It was a pain to do, but it works.


This is the second floor office cubicles. I say this building is done, but it really need furniture and decor. That I will add over time, but for now its game ready. 


The second floor lifts off to show the... empty first floor! At least you get a good shot of the backdoor and the stairs.

The outside sidewalk and lawn. The tree and bush are removable for storage. I tried to get the tree to look like it had that landscape ring cut around it to hide that it was on a base. I used herbs mixed with PVA to make the mulch.

I'm pretty happy with this build, even though it was a lot of work.

Any questions or comments? post em!
Papa Spanky

Thursday, August 9, 2012

Gray Haven board and building progress

I've been brought low with a nice summer cold the past few days so I thought I would take some time to do some much needed progress updates. 


An aerial shot of all three boards together. From here you can see all the drains, sewers and weeds I added, as well as the no parking zones.  


A closer look at the grass median. The trees are real branches and the bushes are Woodland Scenics HO trees. The grass itself is fake rabbit, or teddy bear fur, first seen here . I finished it off with Silflor grass clumps for weeds and fall colored scatter from Woodland Scenics.
Jones and a PT Cruiser face off. My money is not on the Cruiser.  
Another view of the median, I like this shot.

A detail shot of the median, and one of the original drains that made it onto the board. 

Damn Porsche drivers think they can park anywhere...
Just because.

And now its onto the buildings. 


Here is the Post Office, almost finished. I'm waiting on some acetate for the windows and door. It has a decent interior, I'll show it off when its final. 


Progress shots of the police and fire stations. I made the roof of the PD with watercolor paper. 


The back of the PD and FD. I attached a plasticville firehouse to the back of the police station to give it a little more depth. The garage doors will be used as the sally-port for the prisoners. 

 An overview of everything as it is so far. The area behind the PD/ FD will be an open fenced area with maybe a radio tower in it or parking. The other areas are still open for building suggestions. Obviously a gun store is a must. I was also thinking of a small market or convenience  store. I will show off the Hydracorp building at the top later. 

Thanks for looking, questions and comments always welcome!
Papa Spanky


Monday, April 2, 2012

The Easter Bunny came early...


Three different packages came today, from different suppliers. I love it when that happens. The bag is from Demo's Laser Cut Designs, a four pack of shop fronts. I will write up a review on them in the near future.

that is all,
Papa Spanky

Tuesday, March 27, 2012

Gray Haven update... three boards, three stages

Busy, busy, busy. I have lots of things going on, but I will skip the booring day to day stuff and get right to the really important things : updates and pictures! I've mad a little progress on my town, mostly on exspansion. I press molded the drains and sewers; the drains turned out ok, the sewers not so much. So now I'm waiting for my mold making order to arrive so I can make good copies of those.
You can see the middle board has some curbs and drains going in, the far board has just had its streets paved.


I had a corner that was a bit too small for a building, So I created a simple grassy knoll to fill in.


I added a not yet finished Plasticville Post Office to be used as a... post office!

And then finally the almost finished first board with all its building elements in place...

Till next time,
Papa Spanky


Tuesday, February 14, 2012

Streets of Gray Haven- 1st board section

I got a little more work done on my town of Gray Haven in the last few days. This is the first board section; right now three are planned. The base is a 2'x 4' Homasote board. I bought a bunch of it a long time ago when it was dirt cheap. Now that its considered a trendy green material, the cost has risen to the lofty heights of all things green. Bah.
I used 5/16th" rolled cork to make the sidewalks. I experimented a bit with the best way to put in the crack lines.  I tried cutting out individual blocks and giving the edges a slight bevel, vs cutting in the groove with a wood burner. The wood burner is easier, but the individual blocks has the best look. I'm still undecided on which I will use in the other boards.

The roads are drywall compound smoothed over the Homasote in the areas where the roads go. Curbs are thin strips of cork with one edge rounded.

Stormtroopers keep watch on a traffic stop. These guys will end up as part of my Monster Hunters International squad in the future.
In these pictures you can see how the buildings fit into their locations and the bases fit nicely against the sidewalk. I will make other "scenery" that will use the same footprint so I can change out buildings, add ruins etc. to keep these boards as universal as possible. I painted and weathered some before I realized I had forgotten drains and sewers.

A test placement of the sewer and post.

  To remedy that, I made some to be cast and installed at a later time. I guess its good I have construction barriers planned then! Also starring in these pictures is my homemade street light. I'm going to cast the base, I just haven't decided if I should just cast the whole thing or not. It still needs some work, anyhow.

Go build something,
Papa Spanky

Monday, January 30, 2012

Modern building made from Dollar Tree container

A while back I bought a foldable storage bin from Dollar Tree because it looked interesting as a possible building. Well, after some re-working this is what I have so far:

Front side- I havent finished the doors yet.
Back side- the door is hinged and opens
This is the second floor. When the roof comes off, the outside walls go
with it leaving an open floor plan. That design was dictated a bit by the
plastic crate, but I really like it.

This is the ground floor. Notice that the second floor comes off by itself.
In the back left corner you can just see the stairs.
 I haven't glued down any of the interior walls yet, that will happen after painting. Also please excuse the poop colored roof, i needed a thick paint for a tar and stone roof technique and that paint was the thickest I had. The more I look at it though, the more I dislike it and probably will change it soon.
As far as uses this is going in my town that I m building; usable for zombie games, Combat Zone, some post apocalyptic and the like.

Let me hear from ya,
Papa Spanky